Discord Integration

Bot Registration
Before starting Musebot, ensure that you've registered an application with Discord. This guide will walk you through each required menu and setting.
1. Register a New Application
Using your web browser, navigate to the Discord Developer Portal.
Login to the Discord account associated with the Discord server you want to add Musebot to. You must be a server owner or otherwise have permissions to install apps.
Click
New Applicationin the upper right hand corner and name your application. It does not need to be "Musebot", but can be any character or concept you desire. Agree to Discord's terms by checking the box.
2. General Information
You should already be under the
General Informationmenu item, but if not, click theGeneral Informationmenu item/link.
Name your application, add a profile image, and save your changes. Provide a description, tags, or other information if you want.
Save your changes.

3. Installation
Click the
Installationlink in the left navigation menu.
Under
Installation Contexts, make sureUser Installis not checked andGuild Installis checked.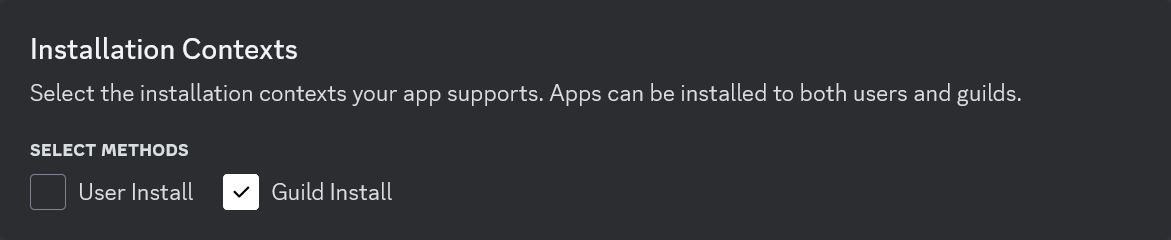
Make sure
Install Linkis set toNone.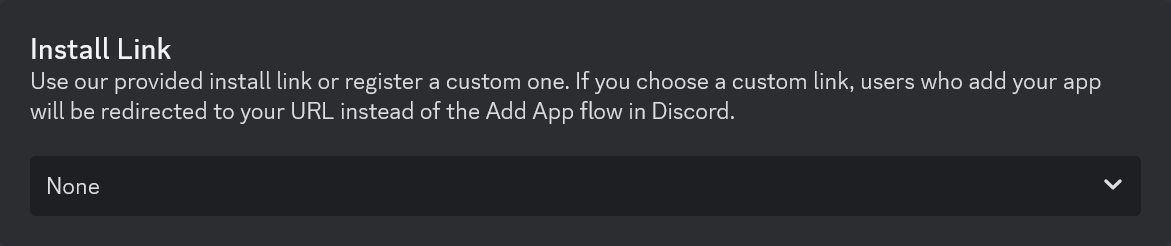
Save your changes.
4. Bot
Click the
Botlink in the left navigation menu.
Under the
Bot, heading you can optionally set an icon and banner that will be displayed under your bot's Discord profile.You can also explicitly set your bot's username if you wish to do so under
Username.In order to obtain your bot's authentication token, you must click the
Reset Tokenbutton. Copy the value and save it underMUSEBOT_DISCORD_TOKENin your.envfile.
It is recommended that unless you know what you're doing, disable the toggle titled
Public Bot.
The
Presence Intenttoggle can be or remain disabled.
Enable the
Server Members Intenttoggle.
Enable the
Message Content Intenttoggle.
Save your changes.
5. OAuth2
Click the
OAuth2link in the left navigation menu.
Under the
OAuth2 URL Generatorin theScopeschecklist, checkbot.In the
Bot Permissionschecklist, check the following checkboxes:- View Channels
- Send Messages
- Read Message History
Integration Typeshould be set toGuild Install.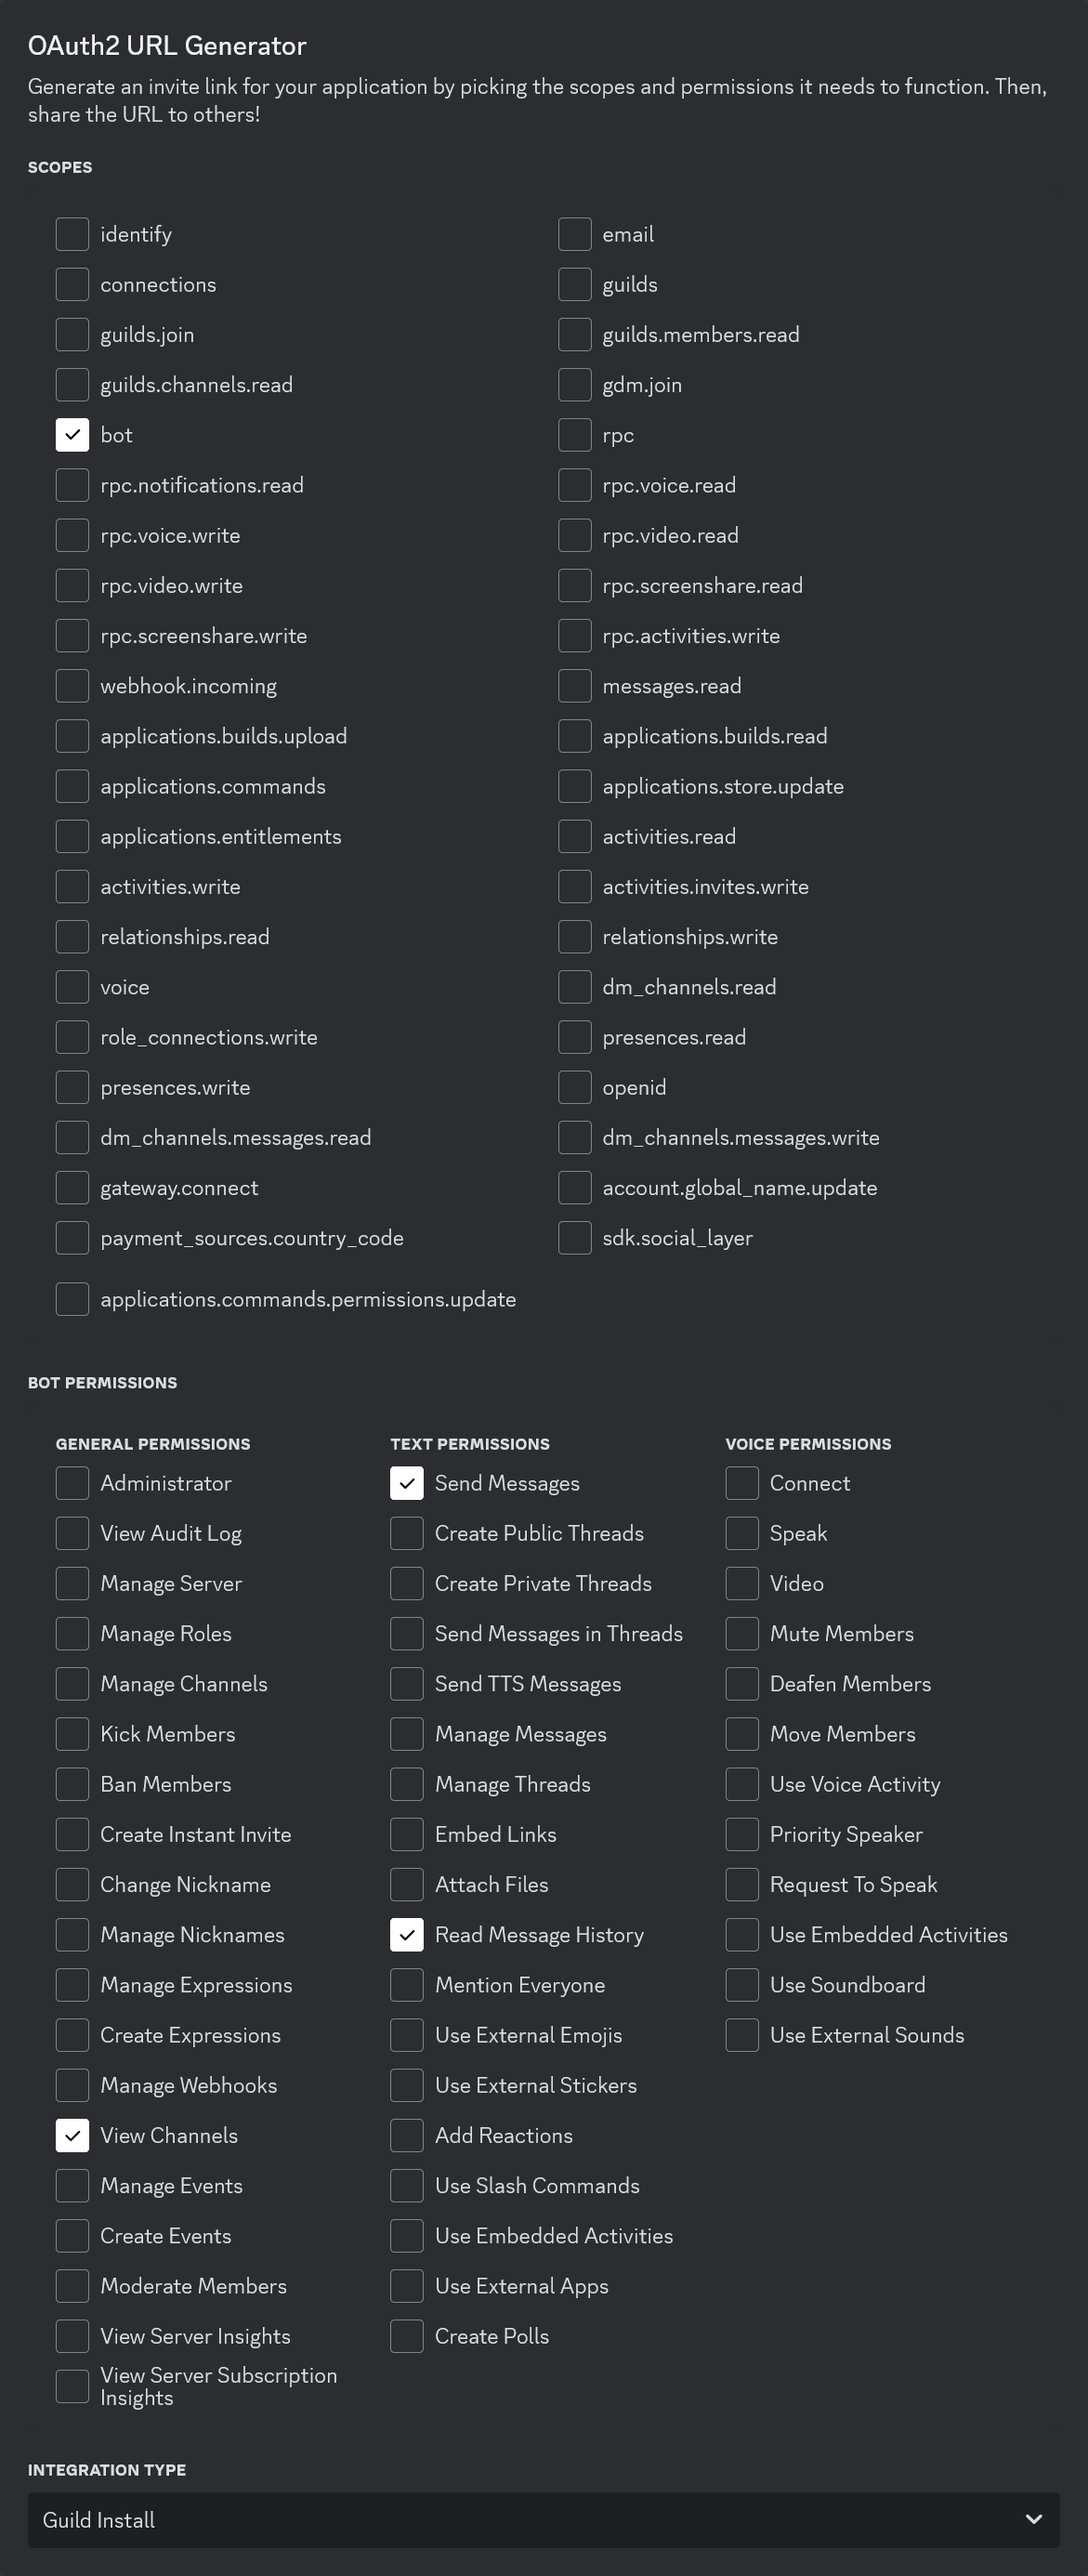
Copy the generated link at the bottom of the page and paste it into a new browser tab. You will be asked to login and/or confirm the bot and its requested permissions.
Lookup Discord Channel IDs
If you decide to restrict Musebot to a single or subset of channels, you'll need to lookup you the channel IDs for your server. Follow these steps to look your channel IDs up:
- In Discord, go to
User Settings»Advanced»Enable Developer Mode. - Right click on a channel for Musebot to use and click
Copy Channel ID. - Add the channel ID(s) to the
MUSEBOT_DISCORD_CHANNELSenvironment variable in Musebot's.envconfiguration file.
Additionally, Musebot can work across multiple Discord servers as long as the bot is added to the server by an administrator or owner. Channel IDs are unique to each server across all of Discord.
Return
Return to the main Musebot Documentation and continue from step 2.